.png?width=300&height=242&name=t650%202pc%20NO%20CABLES%20(1).png)
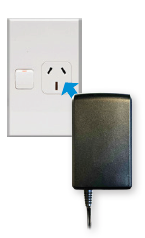
1. Plug the power supply into a wall socket
Switch the wall socket on. The PIN pad will power on automatically.
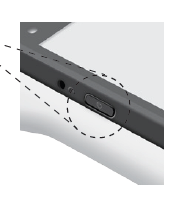
2. Power on the T650c
Press and hold the power button located on the left side of the T650c terminal. The
terminal will power on and load the payment screen.
TIP: Your terminal arrives pre-cabled. If cables disconnect in transit, refer to page 6 of the Quick Start Guide for instructions on reconnecting them.
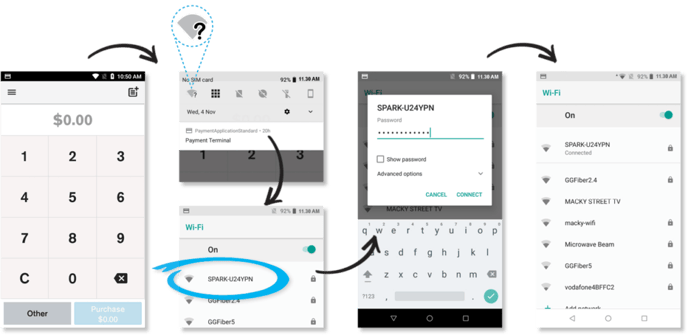
3. Connect to the internet
Via your internet router using an Ethernet Cable
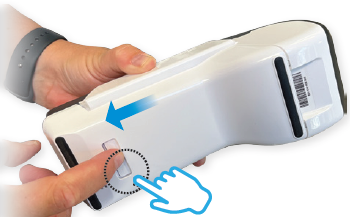
- Remove the cover on the underside of the T650c. Push button down and slide the cover away from the terminal body.
- Plug one end of the Ethernet cable provided into the port labelled ETH on your T650c. Plug the other end of the Ethernet cable into a free LAN port on your router.
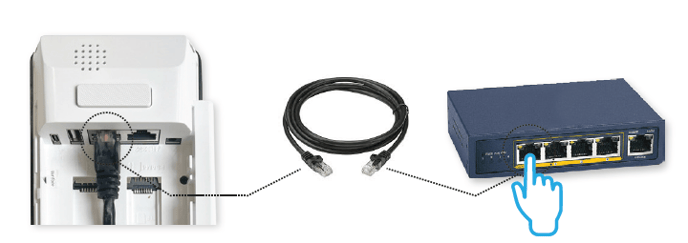
- You will need to press the ethernet cable into the cable groove in order to place the cover back on.
Connect via Wi-Fi
- Swipe down from the Notification bar at the top of the screen and tap and hold the Wi-Fi icon
- Select your network from the available networks list
- Enter your Wi-Fi password and tap CONNECT
- Press the HOME button at the bottom of the terminal to navigate back to the Payment screen
4. Set up your passcodes
We recommend you set your passcodes up when you first get your terminal, so you’re ready to process a refund when you need to.
To set up your passcodes, call our Technical Helpdesk on 0800 338 767 and they will guide you through setting up a six-digit manager passcode and a four-digit cashier passcode.
IMPORTANT: Note that only listed account signatories can set up a passcode.