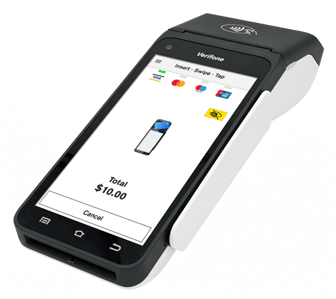
Learn how to set up your new Verifone Android T650p EFTPOS terminal
Set up your Verifone T650p - Video Guide
In this video, we cover:
- What the device comes with
- Setting up the charging base
- Connecting to the Internet
- Setting up refund passcodes
- Changing the paper roll
1. Set up your base:
Your terminal will come charged and ready to use. Press and hold the Power button to power it on or set up your charging base and place the terminal on the base to power it on.
Charging Only Base:

Full feature base:

NOTE: To power off or restart your terminal, press and hold the Power button for 1 second and then tap Power off or Restart. You will need to remove the terminal from the base to turn it off.
2. Connect to the internet
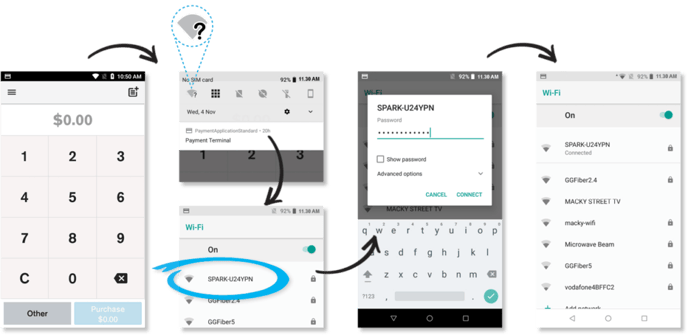
Connect to Wi-Fi
-
-
- Swipe down from the Notification bar at the top of the screen and tap and hold the Wi-Fi icon
- Select your network from the available networks list
- Enter your Wi-Fi password and tap CONNECT
- Press the HOME button at the bottom of the terminal to navigate back to the Payment screen
-
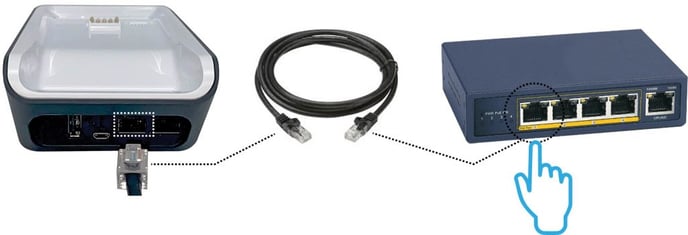
Connect to your router
-
-
- Plug one end of the Ethernet cable provided into the port labelled with the
 icon on your Full Feature T650p base
 - Plug the other end of the Ethernet cable into a free LAN port on your router.
- Plug one end of the Ethernet cable provided into the port labelled with the
-
TIP: Your terminal connects to the base via Bluetooth. If your terminal is configured correctly, once your base is connected to your router, the terminal doesn’t have to be on the base to take payment.
3. Set up your passcodes
We recommend you set your passcodes up when you first get your terminal, so you’re ready to process a refund when you need to.
To set up your passcodes, call our Technical Helpdesk on 0800 338 767 and they will guide you through setting up a six-digit manager passcode and a four-digit cashier passcode.
IMPORTANT: Note that only listed account signatories can set up a passcode.